


Decorative Candles
- Decorative Candles
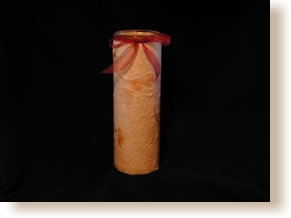
These delightful candles are easy to make and all ages can join in the fun. If you are looking for that "perfect gift" to make, this quick project is for you. Using handmade paper on glass as a decorative element allows you to create affordable one of a kind items that are elegant works of art.
The paper is applied using a good acid-free P.V.A. glue, and embellished with ribbon, feathers, tassels, leather, dry flowers, beads or found objects and can be personalized with a specialty label to add that finishing touch.
Estimated working time: 5 minutes
Materials List:
To make one decorative candle you will need:
- Glass votive candle 2 1/2" diameter x 8 1/4" tall
- P.V.A. Glue
- Glue brush
- Scrap paper (as glue surface)
- X-Acto knife, scissors or paper cutter
- 2" diameter specialty labels
- 24" inches of ribbon, raffia or leather
- Translucent decorative paper such as:
- Mango
- Garden
- Mulberry
- Unryu
- Banana
- Ogura
Directions:
- Create a template by wrapping scrap paper around the glass to be covered. Overlap paper approximate. 1/4" then add 1/2" to the length of the paper to cover the bottom of the glass.
- Cut the decorative paper to template size you just made.
- For the purposes of these instructions, the 2 1/2" diameter x 8 1/4" tall glass candle requires a 9" x 9" square of paper.
- Prepare the glass surface by removing all labels.
- Apply glue to the back of paper using a flat glue brush, in a thin even layer. (have a damp wash cloth ready for glue fingers)
- Transfer paper to a clean surface then place glass on paper aligning the edge of paper with the top of the glass then roll glass into paper and secure seam edge. (glue can be repositioned for about 1 minute)
- When using thin weight papers wait about 1 minute for the glue to tack up before placing paper on glass to prevent glue from seeping through. (if paper is very thin apply a thin coat of glue to glass then apply paper)
- Turn glass up side down on table and crimp excess paper on the bottom from the outside edge toward the center and flatten. Hold paper in place until glue sets. (approximate. 2 minutes)
- Apply label to the bottom of the glass to secure the paper. (personalize labels prior to applying to the bottom)
- Finish with chosen embellishment.
Hints:
A sheet of paper 22" x 30" inches will make 6 candles and each candle will need 24" inches of ribbon.
Enjoy making and sharing your wonderful candles:
- Make a keepsake or take away for that special event.
- Wonderful as a school activity to raise funds.
- Collect those loose bits and photos from your last trip.
These instructions and ideas can quickly be adapted and remember the paper is very forgiving. Whatever you try creates new possibilities.
Safety Precautions:
- never leave a burning candle unattended
- place embellishments away from flame
- keep burning candle out of reach of children and pets
- take care to place candle on a heat resistant surface
- keep candles out of drafts and away from open windows
- the application of paper directly to wax candles is not recommended
Please remember that everything on this web site is copyrighted material. PaperArts.Com does not give permission to copy the content of this web site without prior written release.
© 1998 - 2009 PaperArts.Com - All Text, Publication & Copyrights Reserved
